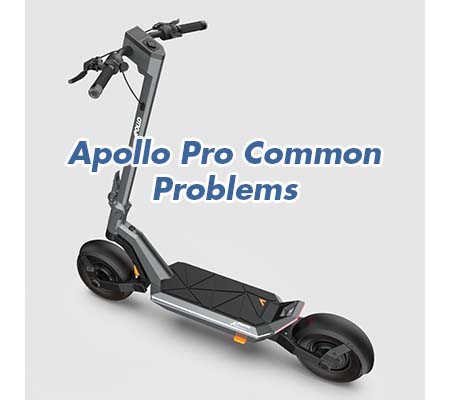
Apollo Pro Electric Scooter Common Problems and Troubleshooting
When it comes to the Apollo Pro Electric Scooter, reliability and performance are key. In this article, we’ll explore some of the common issues that riders may encounter with their specific Apollo Pro Electric Scooter model. Whether you’re a daily commuter or an off-road enthusiast, knowing how to troubleshoot these problems can help you get the most out of your Apollo Pro experience.
Apollo Pro Electric Scooter Overview
The Apollo Pro Electric Scooter is a top-of-the-line choice for both urban commuters and off-road adventurers. With a sleek and sporty design, this scooter offers a remarkable top speed of 38 miles per hour (61 km/h) and an impressive range of up to 56 miles (90 km) on a single charge. Priced at £1,345 (around $1,895), it strikes a perfect balance between performance and affordability.
| Product Details and Features | Specifications |
|---|---|
| Motor | Dual 1,000 continuous brushless hub motors |
| Battery | 52V, 22.5Ah (1,170Wh) LG cells |
| Charge Time | 10 hours (5 hours with fast charger upgrade or with dual chargers) |
| Single-Charge Mileage | 56 Miles |
| Max Speed | 38 mph (60 km/h) |
| Climbing Range | 40% grade hill climb |
| Braking System | Dual disc front and rear brakes, electric regenerative braking |
| Lighting | Front and rear deck-embedded LED lighting, reflectors. |
| Horn | Bell |
| Max Load | 330 lb (150 kg) |
| Scooter Weight | 77 lb (34kg) |
| Product Material | Forged aluminum |
| Folding Handlebar | Unspecified – Alloy Frame |
| Folding Steering Tube | Unspecified – Alloy Frame |
| Suspension | Dual spring suspension |
| Size (L x W x H, mm) | Unfolded: 128L x 68W x 132H cm Folded: 128L x 68W x 52.5H cm |
| Water Resistance | IP54 |
Causes of Common Problems with the Apollo Pro Electric Scooter
In the following sections, we will delve into the common problems that riders of the Apollo Pro Electric Scooter may encounter and provide effective solutions to address these issues. Stay tuned for troubleshooting tips that will keep your Apollo Pro riding experience smooth and hassle-free.
Common Problems and Troubleshooting for Apollo Pro Electric Scooter
1. Power Loss
Description: Some Apollo Pro Electric Scooter users may experience a sudden loss of power, resulting in reduced speed and performance.
Cause: Power loss can occur due to a depleted battery, loose connections, or overheating.
Troubleshooting:
- Check the battery level. Charge the scooter if the battery is low.
- Inspect all connections, including the power cable and connectors. Ensure they are secure.
- Allow the scooter to cool down if it has been in use for an extended period. Overheating can lead to power loss.
2. Inconsistent Braking
Description: Users may encounter issues with inconsistent or delayed braking response when using the .
Cause: This problem can be caused by worn brake pads, air in the brake lines, or issues with the brake lever.
Troubleshooting:
- Inspect the brake pads for wear and replace them if necessary.
- Bleed the brake lines to rEmove air bubbles, which can affect braking consistency.
- Ensure the brake lever is properly adjusted and not sticking. Lubricate if needed.
3. Noisy Rear Fender
Description: Some riders may notice a rattling or noise coming from the rear fender area while using the .
Cause: The plastic rear fender can produce a rattling sound due to vibrations during rides.
Troubleshooting:
- Inspect the rear fender for loose or misaligned parts and tighten them if needed.
- Add padding or dampeners to reduce vibrations and minimize noise.
4. Loose Stem
Description: On extreme off-road terrain, the scooter’s stem may come loose, affecting steering control.
Cause: Aggressive off-roading can cause the stem to loosen over time.
Troubleshooting:
- Regularly inspect and tighten the stem to maintain proper steering control.
- Consider applying thread locker to prevent the stem from coming loose during off-road adventures.
5. Headlight Malfunction
Description: Users may encounter issues with the headlight not functioning correctly on the .
Cause: Headlight problems can be attributed to loose connections, a blown bulb, or electrical issues.
Troubleshooting:
- Check the headlight’s connections and ensure they are secure.
- If the bulb is not working, replace it with a compatible one.
- If the issue persists, inspect the scooter’s electrical system and consult a professional if necessary.
6. Unresponsive Throttle
Description: Some users may face issues with the throttle being unresponsive, leading to difficulties in accelerating the scooter.
Cause: Throttle problems can be caused by a faulty throttle mechanism or loose wiring connections.
Troubleshooting:
- Check the throttle lever for any obstructions or damage. Clean or replace it if necessary.
- Inspect the wiring connections to the throttle and controller. Ensure they are secure and undamaged.
- If the problem persists, consider replacing the throttle assembly.
7. Uneven Tire Wear
Description: Riders may notice uneven tire wear on their , affecting the scooter’s stability and performance.
Cause: Uneven tire wear can result from improper tire pressure, misalignment, or aggressive riding style.
Troubleshooting:
- Regularly check and maintain the tire pressure according to manufacturer recommendations.
- Inspect the scooter’s alignment and ensure the wheels are properly aligned. Adjust if needed.
- Consider adjusting your riding style to reduce stress on the tires and promote even wear.
8. Sudden Shut-Offs
Description: Some users may experience unexpected scooter shut-offs during rides, leading to safety concerns.
Cause: Sudden shut-offs can be attributed to issues with the battery, controller, or electrical system malfunction.
Troubleshooting:
- Ensure that the battery is adequately charged and properly connected to the scooter.
- Inspect the controller and wiring for any signs of damage or loose connections. Repair or replace as needed.
- If the issue persists, seek professional assistance to diagnose and resolve electrical problems.
9. Wobbly Handlebars
Description: Users may notice wobbly or unstable handlebars, affecting steering control and overall ride comfort.
Cause: Handlebar wobbling can occur due to loose or damaged components, including the stem or handlebar assembly.
Troubleshooting:
- Inspect and tighten all handlebar and stem components to eliminate wobbling.
- Ensure that the handlebar assembly is properly aligned and not bent or damaged. Replace if necessary.
- Consider using handlebar stabilizers or dampeners for improved stability during rides.
10. Battery Charging Issues
Description: Some users may encounter difficulties with charging their scooter’s battery effectively.
Cause: Charging problems can result from a faulty charger, damaged battery, or issues with the charging port.
Troubleshooting:
- Try using a different charger to rule out charger-related issues. If the problem persists, consider charger replacement.
- Inspect the battery for any signs of damage or malfunction. Replace it if necessary.
- Carefully examine the charging port for debris or damage, and clean or repair it as needed.
11. Brake Noise
Description: Users may experience squeaking or grinding noises when applying the brakes on their scooter.
Cause: Brake noise can be caused by worn brake pads, debris between the pads and rotor, or misaligned brakes.
Troubleshooting:
- Inspect the brake pads for wear and replace them if they are worn down.
- Clean the brake rotor and pads, removing any debris or foreign particles that may be causing the noise.
- Check and adjust the brake alignment to ensure proper contact with the rotor.
12. Handlebar Height Adjustment
Description: Some riders may wish to adjust the handlebar height to suit their preferences, but they encounter difficulties in doing so.
Cause: Handlebar height adjustment problems can result from seized components or improper techniques.
Troubleshooting:
- If the handlebar is stuck, apply lubricant to the adjustment mechanism and gently attempt to adjust the height.
- Follow the manufacturer’s instructions for adjusting handlebar height. Ensure you are using the correct tools and methods.
13. Uneven Tire Pressure
Description: Users may notice differences in tire pressure between the front and rear tires, affecting the scooter’s stability.
Cause: Uneven tire pressure can result from accidental deflation, air leakage, or inconsistencies in maintenance.
Troubleshooting:
- Regularly check and maintain the tire pressure for both the front and rear tires according to the manufacturer’s recommendations.
- If you notice persistent differences in pressure, inspect the tires for punctures or air leakage. Repair or replace as necessary.
14. Acceleration Lag
Description: Some users may experience a noticeable delay in acceleration when they throttle the scooter.
Cause: Acceleration lag can be caused by controller issues, software glitches, or electrical problems.
Troubleshooting:
- Check for software updates and apply them if available, as they may address acceleration lag issues.
- Inspect the controller and wiring for any damage or loose connections. Repair or replace as needed.
- If the problem persists, consult a professional technician to diagnose and fix potential electrical problems.
15. Loose Suspension Components
Description: Users may notice that the scooter’s suspension system has loose or rattling components, affecting ride comfort.
Cause: Loose suspension components can result from wear and tear, lack of maintenance, or extreme riding conditions.
Troubleshooting:
- Inspect the suspension components for any loose bolts or connections and tighten them as needed.
- Regularly lubricate and maintain the suspension system to prevent wear and loose parts.
- Adjust the suspension settings as per the manufacturer’s recommendations for your riding conditions.
16. Loose or Worn Belts
Description: Some users may experience issues with loose or worn belts that affect the scooter’s power delivery.
Cause: Loose or worn belts can result from extended use, high loads, or lack of maintenance.
Troubleshooting:
- Inspect the drive belts for signs of wear and tear. Replace them if they are damaged or worn out.
- Tighten the belts as per the manufacturer’s recommendations to ensure proper power transfer.
- Maintain the belts and regularly lubricate them to extend their lifespan and prevent slippage.
17. Handlebar Shaking
Description: Riders may encounter handlebar shaking or vibrations, especially at higher speeds.
Cause: Handlebar shaking can be caused by wheel imbalance, misaligned components, or worn-out bearings.
Troubleshooting:
- Inspect the front wheel for balance issues and ensure it is properly aligned. Balance or replace the wheel if needed.
- Check the handlebar and stem for misalignment or loose components. Adjust or tighten them as necessary.
- Examine the headset bearings and replace them if they are worn out to reduce shaking.
18. Faulty Display or Controls
Description: Users may encounter issues with the scooter’s display or control panel, such as malfunctioning screens or unresponsive buttons.
Cause: Display and control issues can result from software glitches, loose connections, or component damage.
Troubleshooting:
- Check for software updates for the display and control system and apply them if available.
- Inspect the wiring connections for the display and controls. Ensure they are secure and not damaged.
- If the problem persists, consider replacing the faulty display or control components with genuine replacements.
19. Rattling Accessories
Description: Accessories like bags or phone holders may produce rattling noises during rides, causing inconvenience.
Cause: Rattling accessories are typically caused by loose attachments or improper installation.
Troubleshooting:
- Check the attachments of accessories and tighten them to prevent rattling during rides.
- Use additional padding or anti-vibration mounts to minimize noise from accessories.
- Ensure accessories are securely attached and do not interfere with the scooter’s operation.
20. Overheating Controller
Description: Some riders may encounter an overheating controller, which can lead to reduced performance and safety concerns.
Cause: Controller overheating can occur due to aggressive riding, high ambient temperatures, or blocked ventilation.
Troubleshooting:
- Avoid continuous aggressive riding and allow the controller to cool down during extended use.
- Ensure proper ventilation around the controller area and clear any obstructions that may block airflow.
- If overheating continues to be a problem, consult with a technician to check for potential issues or upgrades.
21. Inaccurate Battery Indicator
Description: Users may notice that the scooter’s battery indicator displays inaccurate information, making it difficult to gauge the remaining battery life.
Cause: Inaccurate battery indicators can result from calibration issues or battery-related problems.
Troubleshooting:
- Recalibrate the battery indicator by fully charging and discharging the battery a few times. This can help improve accuracy.
- If the problem persists, have the scooter’s battery checked by a professional to ensure it is functioning correctly.
22. Loose Kickstand
Description: Users may encounter issues with a loose or wobbly kickstand, affecting the scooter’s stability when parked.
Cause: The kickstand can become loose due to frequent use or improper installation.
Troubleshooting:
- Tighten the kickstand’s mounting bolts to secure it in place. Check periodically for any signs of loosening.
- Ensure the kickstand is properly aligned and installed according to the manufacturer’s instructions.
23. Tires Losing Air Quickly
Description: Some riders may notice that the scooter’s tires lose air quickly, requiring frequent inflation.
Cause: Rapid air loss can result from punctures, damaged valve stems, or aging inner tubes.
Troubleshooting:
- Inspect the tires for punctures or foreign objects and repair or replace them as necessary.
- Check the valve stems for damage and replace them if they are leaking air.
- If the inner tubes are old, consider replacing them with new ones to prevent air loss.
24. Stuck or Jammed Folding Mechanism
Description: Some users may encounter difficulties when trying to fold or unfold their scooter due to a stuck or jammed mechanism.
Cause: Stuck folding mechanisms can result from dirt, debris, or misalignment of components.
Troubleshooting:
- Inspect the folding mechanism for dirt or debris and clean it to ensure smooth operation.
- Check for misaligned or bent parts in the folding mechanism and realign or replace them if necessary.
- Apply lubricant to moving parts to reduce friction and prevent jamming.
25. Loose or Uncomfortable Grips
Description: Users may experience issues with loose or uncomfortable handlebar grips that affect grip and control during rides.
Cause: Loose or uncomfortable grips can result from wear, improper installation, or low-quality materials.
Troubleshooting:
- Ensure that the grips are properly installed and tightened on the handlebars. Reinstall them if needed.
- If the grips are worn or uncomfortable, consider replacing them with higher-quality and more ergonomic alternatives.
- Use grip wraps or tapes to enhance comfort and grip while riding.
Apollo Pro Electric Scooter User Reviews
Customer feedback is a valuable resource when considering a purchase, and the Apollo Pro Electric Scooter is no exception. In this section, we’ll summarize both the positive and negative experiences shared by Apollo Pro Electric Scooter users. These insights are derived from user feedback, providing you with a well-rounded view of the product’s performance and customer satisfaction.
Positive Reviews from Apollo Pro Electric Scooter Users
- Some users were satisfied with the following parameters associated with the Apollo Pro Electric Scooter:
- Impressive Speed and Range: Users were delighted by the scooter’s top speed of 38 mph (61 km/h) and an outstanding range of up to 56 miles (90 km) on a single charge, making it ideal for longer commutes and adventures.
- Sturdy Build: Many users appreciated the robust and durable construction of the scooter. Its forged aluminum frame and reliable components contributed to its longevity.
- Powerful Dual Motors: The dual 1,000W brushless hub motors received praise for providing ample power, allowing riders to conquer various terrains with ease.
- Quality Suspension: The dual spring suspension system was well-received for offering a smooth and comfortable ride, even on uneven surfaces.
- Stylish Design: Several users commended the scooter’s sleek and sporty design, making it an eye-catching and fashionable choice.
Negative User Reviews of the Apollo Pro Electric Scooter
- Some users were not satisfied with the following problems associated with the Apollo Pro Electric Scooter:
- Charging Time: A few users expressed frustration with the scooter’s lengthy 10-hour standard charging time, even though there are options for faster charging.
- Weight: Some found the scooter’s weight (77 lbs) a bit heavy, making it less convenient for carrying or lifting.
- Noisy Rear Fender: A handful of riders reported a rattling sound coming from the plastic rear fender during rides, which was a minor annoyance.
- Limited Water Resistance: A few users expected higher water resistance, as the scooter is rated at IP54. They mentioned concerns about riding in heavy rain.
- Handlebar Height Adjustment: Several users found it challenging to adjust the handlebar height to their preference, and this process could be smoother.
Overall, it’s evident that the majority of users expressed satisfaction with the Apollo Pro Electric Scooter. While there were some concerns and negative experiences, such as charging time and handling weight, these were often outweighed by the positive feedback regarding the scooter’s speed, range, build quality, and design. This balanced perspective provides valuable insights for potential buyers to make informed decisions.
Apollo Pro Electric Scooter Manual
The operating instructions for the Apollo Pro Electric Scooter can be found on the manufacturer’s website. You can access the manual by visiting the official website of Apollo Pro Electric Scooter manufacturer.
Apollo Pro Electric Scooter Frequently Asked Questions
1. How do I charge my Apollo Pro Electric Scooter?
To charge your Apollo Pro Electric Scooter, plug the charger into the charging port located on the scooter. Connect the charger to a standard power outlet and follow the recommended charging time provided in the user manual. Make sure the charger is securely connected, and always use the provided charger for safe and efficient charging.
2. What should I do if my scooter’s range seems to be decreasing over time?
If you notice a decrease in your scooter’s range, it’s essential to check the condition of the battery. Ensure the battery is well-maintained, and follow proper charging practices. If the issue persists, consider having the battery inspected or replaced by a professional technician. Regular maintenance and proper care can help maintain your scooter’s range over time.
3. How can I address unusual noises or vibrations while riding my Apollo Pro Electric Scooter?
Unusual noises or vibrations can be indicative of various issues. First, inspect your scooter for loose or damaged components. Ensure that all parts, including the handlebar, stem, and fenders, are securely fastened. If the problem persists, it’s recommended to consult the user manual for troubleshooting tips or contact the manufacturer’s customer service for further assistance.
Conclusion
For any problems or concerns with your Apollo Pro Electric Scooter, it’s advisable to consult the user manual, reach out to customer service, or visit a certified service center. Proper maintenance, adherence to user instructions, and seeking professional assistance when necessary can help ensure a safe and enjoyable experience with your electric scooter.
Apollo City Common Problems and Troubleshooting